Oat Bag Barricade and Golf Clubs

Good morning, I hope everyone's porridge was just right.

It's been a bit of a tedious week, fixing and improving little bits here and there. I spent a lot of time troubleshooting a bug where the pathfinding system would suddenly stop working mid game. It turns out that one of the towers, the Oat bag Barricade was, on construction, adding itself twice to the list of towers that enemies use for choosing their target. When the tower gets destroyed, it removes itself from this list, but because it was in there twice, it would only remove one instance of itself. The AI units would as a result target the tower that was still in the list, but not on the map, immediately realise it didn't exist, return to their idle state, only to target the non-existent tower again. Each time a unit enters its idle state, it updates the pathfinding graph so that other units would path around them, but because the bug meant that units were constantly entering and exiting the idle state every frame, the pathfinding thread got overwhelmed with more graph updates than it could handle. I have to say, I'm quite relieved to have that one solved.

Anywho, let me tell you about the Oat bag Barricade and the Golf Clubs.

The oat bag barricade, unlike the other towers, doesn't provide any additional offensive capabilities. Instead it functions the same as cover that you might find in the level, with the difference that it can be placed wherever you like, and that it can be destroyed. The oat bag barricade is more effective as cover than most cover you'll find in the levels, because it is taller. It has room for two Scotsmen, and can be placed more cheaply than any of the other towers. They can also be useful for walling off areas to direct enemies to take more dangerous routes.

The golf clubs serve the same role as they did in the first game, sniping enemies from long distance before they get close enough to attack. They fire further and more accurately than any other tower in the game. However, they provide no cover for the user, and find it harder to hit faster moving targets. They do have a decent fire rate, thanks to the automatic golf ball dispenser, and have an average cost.

Fondue Hose

In Defend the Highlands World Tour, the Scotsmen gain access to a new foreign tower in every country they visit. In France, they unlock the first foreign tower, the Fondue Hose.

The Fondue hose is essentially a fire hose that has been converted to spray delicious, but blisteringly hot melted cheese over nearby enemies. It can sustain a constant stream, enabling it to continuously take down enemies, and is particularly deadly against tight groups of enemies. Against melee attackers, it is the most powerful tower in the game.

However, it is very expensive, and is out-ranged by nearly all ranged enemies, and because it provides no cover, the user is extremely vulnerable. To be used effectively, it should be placed in a sheltered spot that requires enemies to get very close before they can attack it.

Because of its great power, but great weaknesses, the fondue hose is a tower that requires plenty of forethought to use effectively.

Your Mother was a Hamster

As the Scotsmen make their way deeper into France, they encounter some of its medieval inhabitants. The Knight and the Monk make their first appearance in Level 3, Le Chateau De Ponce, and old abandoned French castle.

The French knight charges in, wielding insults along with their sword (as everyone knows French knights do). They are difficult to kill, but not the fastest enemy, and quite expensive, so you shouldn't have to deal with them in the same number as the cheaper enemies.

The monk moves slowly, preoccupied with hitting themselves in the head with planks of wood. They are therefore quite easy to dispatch before they get close enough to do any damage. However, if they do manage to get into range, they unleash a rapid fire barrage of holy crosses, which they throw in an arc, enabling them to easily hit units behind cover (Imagine a Christian hammer bro).

The GUI So Far

Among other things, this week I've been doing some work on the UI. It's an area that could have done with some improvement in the previous game, so I'm keen to get some feedback to make sure I get it right this time around.

It's still a work in progress as you can see. The empty bar at the top will show a completion meter for the haggis factory construction (while it's being constructed), and a percentage enemies killed meter during the enemy's final assault. I haven't got the minimap system built yet either, so the minimap shown is just a dummy one from the previous game.

I'd like some feedback on how it's looking so far in terms of the colour scheme, layout etc. Also, do you think it looks Scottish enough? I've gone for the Scottish unicorn and lion rampant heraldry, and the Celtic knotwork panel borders as you can see. I tried putting a subtle tartan overlay on the panels, but it looks too noisy. If anyone can think of some other ways to throw some Scottish flavour in without making the interface look too busy, I'd love to hear them.

Thanks.

Edit:

Here's an updated version based on the feedback I've gotten. As well as the layout changes, I've removed the rally point button. Rather than having an extra button clogging up the interface, the rally point is now set by selecting the Kilt-Lift-O-Matic (where new Scotsmen are spawned) and right clicking where you want Scotsmen to rally.

Joan of Arc

"Viva la Scotland", as the traditional French saying goes.

Joan of Arc is the first foreign hero to join the Scotsmen's cause. After seeing how the Scots defeated the hated English, she vows to aid the Scotsmen to bring their superior culture to the world, even if it means going up against the modern French people.

She joins the Scotsmen in the second level, Eiffel Tower, when the French unreasonably object to the plan to build a haggis factory in front of their country's most iconic building.

Joan of Arc's sword gives her high melee damage, and her armour means she has the highest health of all the game's hero characters. However, her knife throwing ranged attack is not as effective, with shorter range than the rest of the heroes. This makes her best suited to close quarters fighting and holding the front line against melee enemies, similar to the role William Wallace played in the first game.

Multiplayer

One of the most requested features for Defend the Highlands was multiplayer. I'd decided at the beginning of that project, in the interest of keeping my goals realistic, to only do single player. For Defend the Highlands World Tour however, I've decided to make my first foray into the world of multiplayer programming.

World Tour will have two multiplayer game modes, co-op and vs. In co-op, the players each have a separate group of Scotsmen (distinguished by kilt color). They share resources, and can use each others towers, but cannot control each others Scotsmen. As in a single player game, the goal is to construct the haggis factory and defend it from the waves of enemies.

In Vs. mode, one player will take control of the Scotsmen, while the other will take control of the enemies. The player controlling the Scotsmen will start with a large amount of money and Scotsmen, and a completed haggis factory. They will get a short head start to set up their defences. The player playing as the enemy will have a gradual income of “recruitment points” as well as earning extra recruitment points for defeating Scotsmen. They can recruit whatever enemies they like at any of the enemy spawn zones, and control them the same way as they'd control their Scotsmen in single player. Their goal is to defeat the Scotsmen in as short a time as possible. After they have defeated them, the players switch roles. This goes on for as many rounds as the players chose when configuring the game. At the end, the player who cumulatively held out for the longest amount of time when playing as the Scotsmen wins.

Setting up the multiplayer system has been quite a wrestle so far, but this week I've managed to get it running error free for the first time. I've had to devise a way of keeping the bandwidth requirements reasonable, without having to scale back the gameplay, which allows hundreds of units, and hundreds more physics based projectiles in play at once. The normal way of handling this in strategy games is to use a lockstep simulation, where only the players inputs are sent over the network, relying on the deterministic nature of the game to ensure that each player's instance of the game will remain in sync when given the exact same inputs. Unfortunately, Unity's physics system is non-deterministic. In my research I've not been able to find anyone who's succeeded in implementing a lockstep simulation in unity (although many have tried).

I've managed to come up with a solution that in my calculations should keep the bandwidth requirement below 256 Kbit/sec.

  • One player will be authoritative (the master), running the AI, damage system, commands etc. The other player's simulation (the client) simply provides a visual representation of the game, and relays input to the master (there will only be 2 players per game)

  • Each simulation will keep a register of all units. 10X per second, the master will send the position of all units in the register to the client. Because the register is an exact copy, only the positions need to be sent, without reference to the unit. The client can rely on the order of the received positions being the same as the order of the units in the register, to know which unit each position refers to. The client then uses interpolation to smooth unit movement.

  • Positions will be sent as 2 short (16 bit) integers, representing the X and Z co-ordinate of the unit. The gameplay area will be 256x 256 metres. Because a short integer has 65, 535 possible values, this allows the position to be represented in increments of approximately 4mm. The Y co-ordinate doesn’t need to be sent, as it can be calculated on the client by raycasting to find the ground. These optimisations mean each position sync takes only 32 bits, as opposed to 96 bits if using plain Vector3s.

  • Unit rotations will not be sent, but calculated on the client based on a unit's movement direction and target. Because the rotations don't have a significant effect on gameplay, it doesn't matter if they aren't exact.

  • Commands such as launching a projectile or applying damage will only be initiated by the master.

  • When a projectile is launched, the master will send the launch location and velocity to the client. The client can then mirror the projectile's simulation without needing to constantly send the projectile's position. To get around the non-determinism of Unity's physics, the projectile will not apply damage on the client. Instead, when it collides on the master, the damage message will be sent to the client. This way if the physics simulation differs on the client, it will be purely a visual difference, and won't desync the game.

  • When the client gives a unit a command, the command will be sent to the master to execute.

  • The register of units will allow up to 256 units. This limitation allows units to be referenced over the network with an 8-bit integer (byte), instead of a standard 32 bit int.

The system is working well so far. The main problems I've encountered so far have been the result of the unit registers becoming out of sync, resulting in the wrong units getting the wrong positions and commands, or commands not finding a unit to apply to. After days of work, I've managed to eliminate all of the registry desyncs in the current build. I can now run a playable co-op multiplayer game without errors, which has been a huge relief. Here's hoping I can keep it that way.

PS: Sorry for the long, boring, technical post. Pretty pictures of Joan of Arc next week :)

PPS: I'm using Photon Unity Networking

Alfredo - Leader of Scotsmen

Hello Scotsmen (and other people).

The famous Alfredo returns to lead the Scots to war once again. Not content with a simple life of serving whisky, while Scotsmen around the world suffer in a state of chronic haggis deprivation, Alfredo has taken up the broken bottle and porridge bowl once more, to fight for what he believes in.

Though he has aged since the last game, the years have not dimmed Alfredo's fighting spirit. Unusually however, they have made him better looking (if I do say so myself) Here's a before and after picture to give you an idea.

Although I've got a lot more characters to make for this game, I intend to put more effort into each one, since the character modelling was one of the common criticisms of the first game. (Notice the painstaking work of drawing individual body hairs :P) Critiques are welcome of course.

Alfredo is the first of 7 hero characters in the game, and the only one the player has from the beginning of the game. Like in the first game, Alfredo must survive each level, making his protection one of the players' highest priorities. He is a good all-round fighter, using whisky bottles as a weapon for throwing, and smashing over enemies' heads.

Unlike in the previous games, hero characters is World Tour can use towers, making them more versatile than before. Of course, with their superior combat abilities, the player will have to decide when it's worth having them use towers instead of their own attacks.

Return of the Porridge Cannon

Good day haggis fans.

The porridge cannon is one of three towers the player gains access to in the tutorial level. Players of the first game will be familiar with the porridge cannon. There are twelve towers in World Tour, which are broken into two categories: Scottish towers, which are from the original game, and Foreign Towers, which are new towers that the Scotsmen steal from the lands they vanquish. The Scottish towers can be unlocked at any point in the game using money the player has earned playing the levels (with the exception of the Towers that the player begins with). The foreign towers become available at specific points during the game.

The porridge cannon fires a scattergun blast of hot porridge. The closer the enemy is, the more of the porridge is likely to hit them, so the more damage it can do. It is also perfect for firing at groups of enemies where it can damage multiple foes in one shot.

Technology has progressed since the first game, with the cannon now having an automatic reloading mechanism, consisting of a drum of industrial grade porridge suspended over a hatch in the barrel. After each shot, the hatch automatically opens, and the drum empties a measured amount of porridge into the chamber.

The porridge cannon is heavy, and slow to rotate to face new targets. It is therefore most suited to defending narrow areas, rather than a wide field. The porridge cannon can fire further than a Scotsman can throw, but it does less damage the further away the target is. It also provides less cover than Scotsmen can achieve using cover objects in the level, or some of the other towers. It is particularly vulnerable to attacks from the left because of the users firing position. A wise Scotsman will have to take these things into account when placing their porridge cannons.

The Battle of Agincourt

The first level in the game (which is a tutorial level) takes place on the field of Agincourt, where the French suffered one of their worst defeats during the hundred years war, and where they are soon to suffer their first defeat at the hands of the Scots.

The tutorial introduces the player to farming, building, recruiting, using cover and towers, and tactics.

Agincourt is a simple map, which gives the player plenty of advantages while they learn how to play. The player begins on the high ground, surrounded by the remnants of the English defences from the battle, providing them with good defences to begin with. The player can either stay within the defences, allowing themselves to hold three of the six oat fields, or they can advance forward in order to hold all six, at the expense of not having as much cover.

The battlefield is flanked by wooded hills, so that the enemy can only attack head on by crossing the large, open field, where they can be easily picked off at range.

The player gains access to the oat bag barricade, porridge cannon and golf clubs as they progress through the tutorial, and they will also encounter the first two enemies, the French woman who attacks by firing cigarettes from her cigarette holder like a blowgun, and the Frenchman, who wields a baguette.


The French

The French were bound to oppose the construction of Haggis factories in their country. With their proud culinary heritage, they simply could not stand to have foodstuffs not containing frogs or snails manufactured under their very noses.

The first enemies the player encounters in the game are the Frenchman and French Woman.

The French man charges at the Scotsmen, wielding an oversized baguette. He is fast, and attacks rapidly. Fortunately, he is quite weak, and a baguette can only do so much damage, but they can easily overwhelm the Scotsmen with numbers.

The French Woman is quite slow (Moving via a seductive walk). However, unlike the French man, she can attack at range, using her cigarette holder as a blowgun to fire cigarettes at the Scotsmen. This is quite damaging, but fortunately, she can't attack very fast, and will quickly perish under a hail of porridge.

There will be another two enemies the player encounters in France, as well as the French Boss, Napoleon Bonaparte, which I'll cover another time.

The Haggis Factory

The player's goal in each level is to build this: The Haggis Factory

Any Scotsman can be assigned to construct the Haggis Factory, and the more Scotsmen are working on it, the faster it will go up, although the relationship is not linear, so you get diminishing returns for each additional Scotsman. You can have up to 12 Scotsmen building at once.

The Haggis Factory is present at the start of the level as a bunch of Scaffolding.

As it becomes more complete, the model will gradually change, until the Scaffolding is gone, and the completed factory is fully constructed.

As the player builds the factory, enemies will try and sabotage the construction by attacking it, and the Scotsmen building and defending it. Once the Haggis Factory is up, the enemy will fall back for a few minutes, before launching a final assault. If the player keeps the factory standing until the assault is defeated, they win the level.

As well as being crucial to winning the level, the haggis factory has plenty of good, elevated cover positions along the roof railings, and the only way up is a narrow staircase. This makes it a great stronghold to fall back to when the fight gets desperate (provided you've stockpiled enough porridge, since there are no farms on the factory :P )

The Four Scotsmen of the Apocalypse

Good day to you all. It's time I introduced you to the stars of the game. The Scotsmen:

Scotsmen are the core unit in the game. They fight, build, harvest oats, operate towers and the Kilt-Lift-O-Matic, and willingly lay down their lives to defend their right to construct haggis factories in foreign countries without permission from the local authorities.

I've made the four models so far, but I'll probably do more for some extra variety (and if anyone has any suggestions for additional Scotsman models, I'd love to hear them). The model types will all function the same in game, so the differences will be purely aesthetic. When you recruit a new Scotsman the game will randomly pick which model to use.

Scotsmen fight by throwing bowls of porridge, and fighting with their fists against enemies that come too close. They can use cover to protect themselves from enemy projectiles. Their fighting skills are average all round, but they become much more specialise when they are assigned to operate a tower. For example, when operating the Golf Clubs tower, they can hit a golf ball very far and accurately, but not as rapidly as they can throw porridge bowls. The Fondue hose one the other hand has a shorter range, but absolutely slaughters any enemies that get close.

Defend the Highlands World Tour - Now in Development

Whatto lads and lasses. Welcome to the first of many blog posts on the development of Defend the Highlands World Tour. The game follows on from Defend the Highlands - http://store.steampowered.com/app/374830/. This first post will be a brief overview of the game.

For those unfamiliar with the franchise, here's a quick synopsis of the story so far:

Jealous of their fine culinary culture (and a bunch of other random reasons) The English, Irish and Welsh invaded Scotland. Of course, many Scots weren't too happy, so they formed a resistance around the unlikely hero Alfredo, a humble pub owner from Northern Scotland. The Scots rampaged through the highlands, defeating every English, Irish and Welshman they encountered, until they had retaken Scotland. Not satisfied however, they continued their campaign through the rest of Great Britain, until the entire British isles were under Scottish rule.

Now to Defend the Highlands World Tour:

Alfredo has been deeply disturbed of late, hearing stories of Scotsmen around the world who are unable to find haggis in their local supermarkets. Something must be done. So he assembles an army of Scotsmen to come with him around the world, constructing Haggis factories in every corner of the globe. He is joined by the mad Scientist, Mac McMac, whose latest inventions – the Bagpipe Airship and the Kilt-Lift-O-Matic – will be vital tools in their mission.

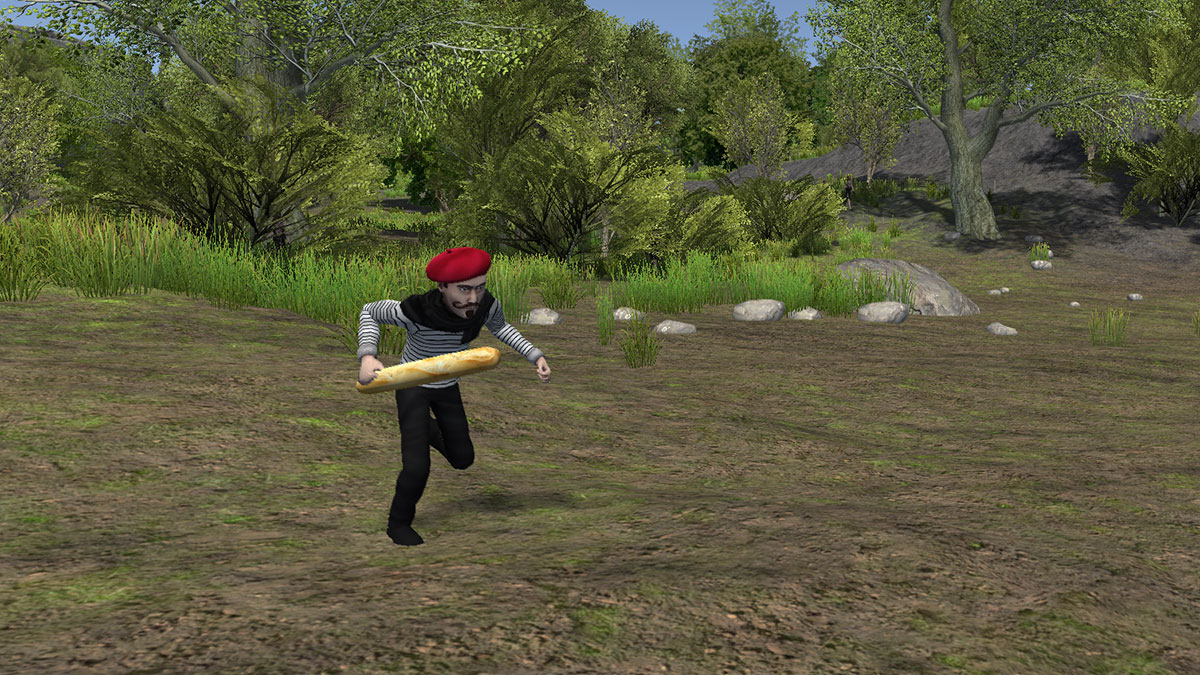
The Scotsmen begin their journey by crossing the pond to France, where they plan to build haggis factories on the field of Agincourt, at the Eiffel Tower, in the ruins of the Chateau de Ponce, and in the French Riviera. They soon realise that the locals aren't so keen on having Haggis factories built in their countries, and that they will have to fight off waves of angry stereotypes if they want the factories to stand.

The game will feature:

  • 6 Countries (France, Italy, Egypt, Australia, Japan and the USA)

  • 24 levels

  • 24 enemies

  • 6 bosses

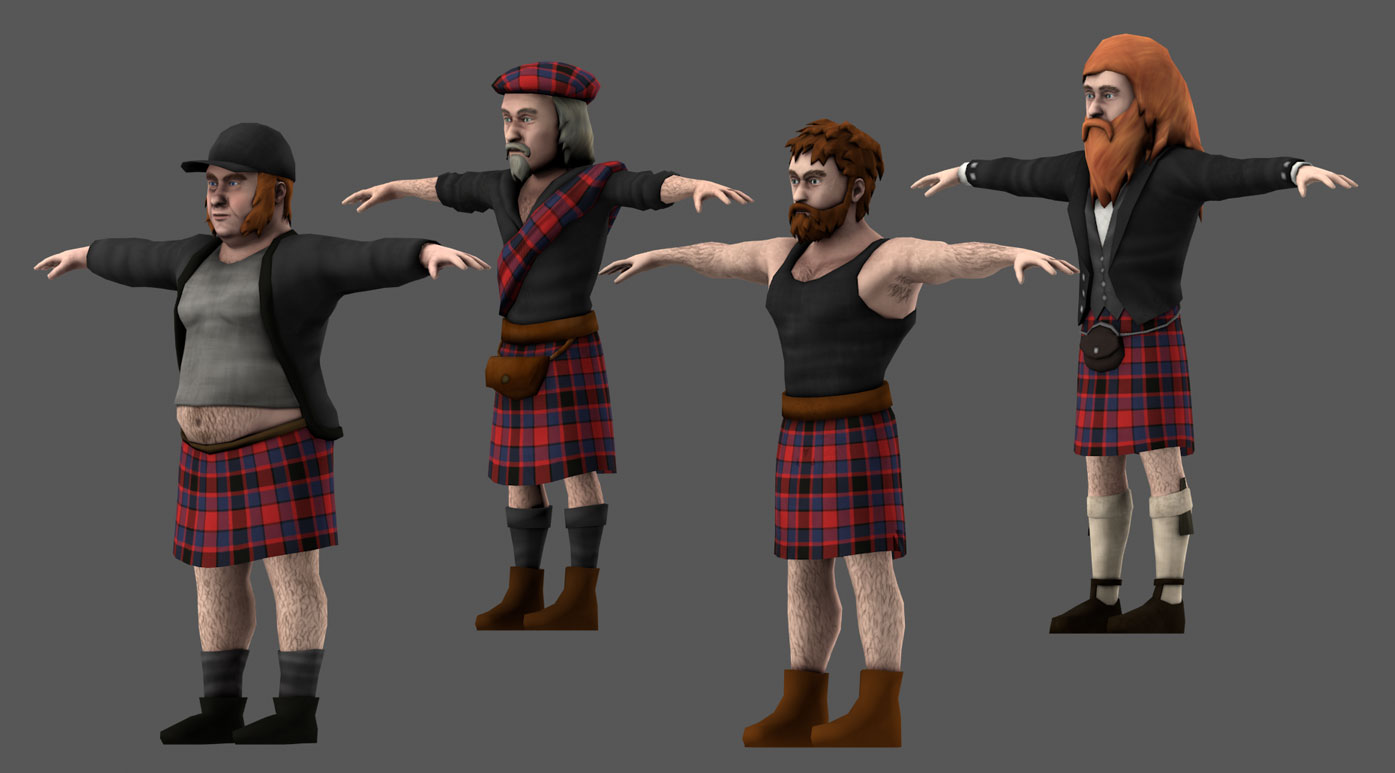
  • 7 hero characters (Alfredo, plus one who joins the Scotsmen in each country)

  • 12 towers (6 Scottish towers, and 6 foreign towers)

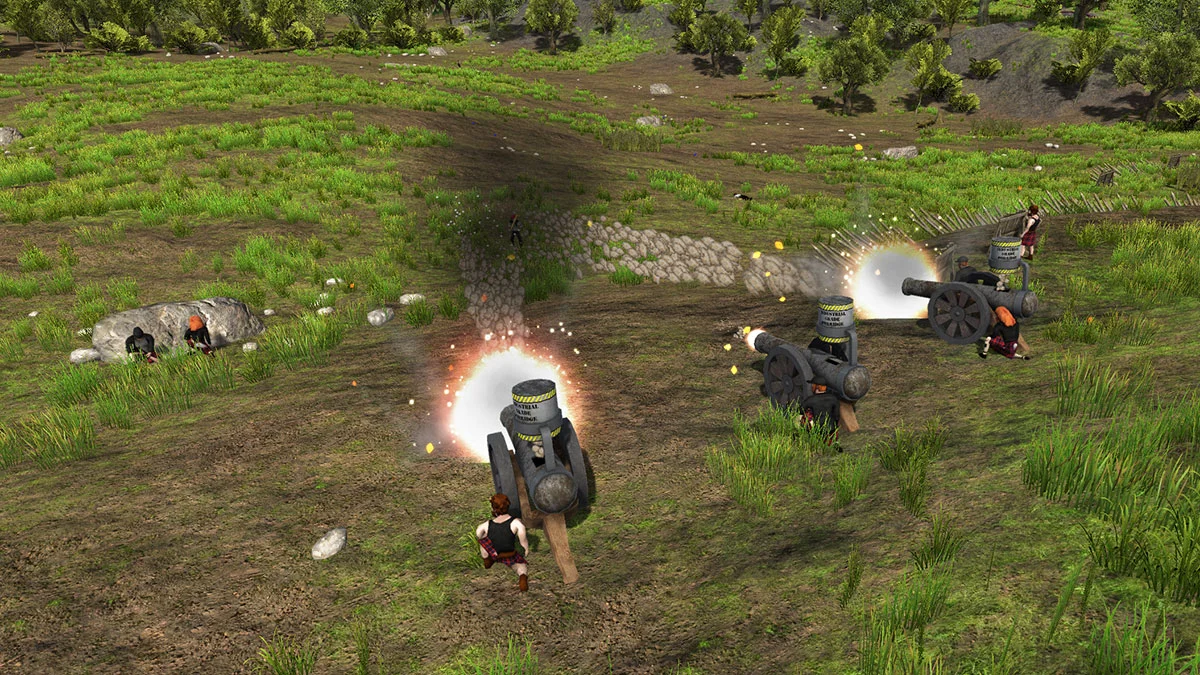
The game plays like a combination of RTS and Tower Defense gameplay (anyone who's played the first game will know what I mean). Essentially, you command Scotsmen by selecting them and right clicking, and you construct towers by clicking the tower's build button and then clicking on the level where you want to place it.

The core game mechanics are:

  • Constructing a haggis factory: In the beginning of each level, the player will start with a bunch of scaffolding air-dropped from the Bagpipe Airship. They will have to assign Scotsmen to construct the haggis factory. The more Scotsmen working on it, the faster it goes up.

  • Defending the haggis factory: The enemies will be constantly attacking as the player tries to build the haggis factory. Also, once the factory is built, the enemies will stop attacking for a few minutes, before unleashing a huge, last ditch attack to destroy it.

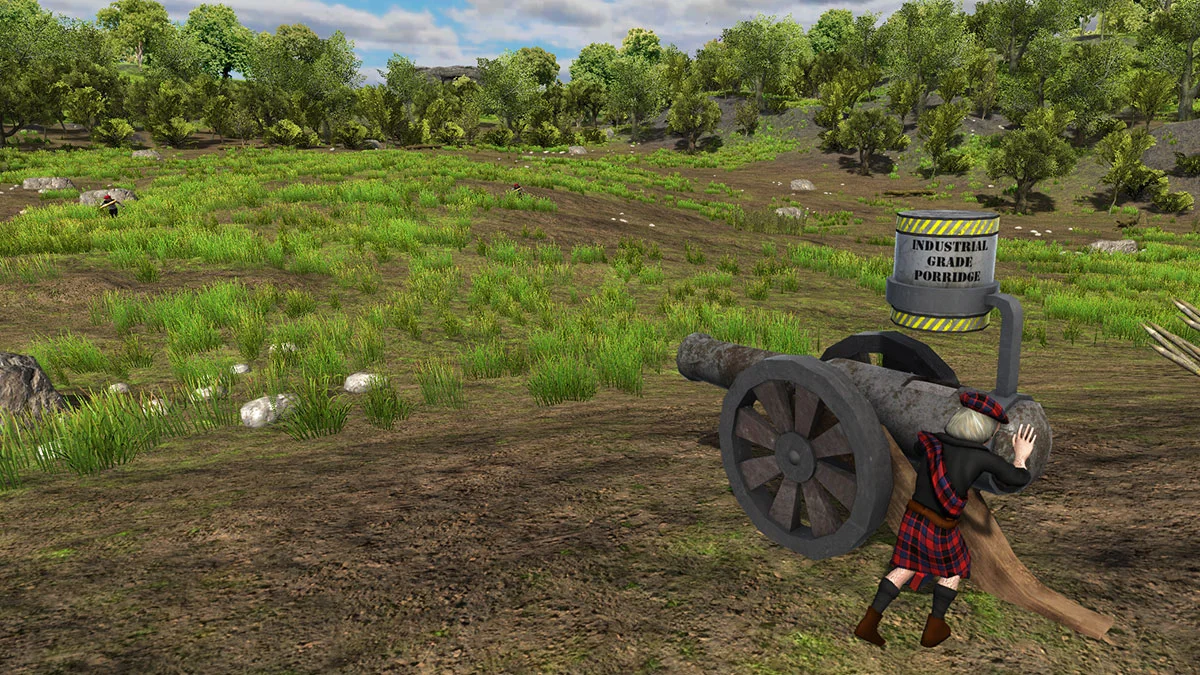
  • Constructing towers: The player will have to construct defensive towers using money they earn by defeating enemies. The towers also have to be manned by Scotsmen in order to function.

  • Recruiting more Scotsmen: The player has an unlimited supply of Scotsmen in the Bagpipe Airship. Unfortunately they can only get them down one at a time, using the Kilt-Lift-O-Matic, a machine that blows air upwards so that Scotsmen can parachute down using the updraught in their kilts. The more Scotsmen the player assigns to operate the Kilt-Lift-O-Matic, the faster they will be able to get reinforcements.

  • Farming Oats: Each map contains six oat fields. Each oat field the player holds will provide a set amount of porridge per minute. Each Scotsman on the field consumes a set amount of porridge per minute. The player has to keep a positive porridge balance, or the Scotsmen will begin to desert.

  • Purchasing upgrades: At the end of each level, the player will be awarded an amount of money based on their performance, as well as any unspent money left from the level. They can use this to unlock Scottish towers (as opposed to foreign towers, which are unlocked at set points in the game), and upgrade the stats of their Scotsmen and existing towers.

Like in the first game, the tone is essentially taking the piss. I like making games that are funny and don't take themselves seriously. I also like complex strategic and tactical game play, that is easy to learn, but difficult to master. These are the two main qualities I aim to embody in Defend the Highlands World Tour.

That's about it for this blog post. I'll be aiming to post a new one every weekend, highlighting the work I've been doing on the game that week. I hope to see you next time.

Best regards,
Kilted Camel.