The Beach

Everyone knows Australians love the beach, so it should come as no surprise that they should object to having a haggis factory constructed on their pristine white sands. Angry at this imposition, they have come to tear it down, and murder the Scotsmen responsible. Luckily, Alfredo comes to the rescue.

Perched on the cliffs overlooking the beach, the Haggis factory is in an easily defended location. However, the Scotsmen will need to venture down towards the water if they want to be able to harvest the majority of the oats on the map.

All the enemies in this map come from the sea on boats, so the player will be able to make good use of the cliffs to position towers to strike the enemy as they disembark and make their way up the beach. The paths between the cliffs funnel the enemies into narrow areas where the player can ambush them, if they manage to take control of the beach, although this strategy should be used as a last resort since it means sacrificing the two oat fields on the beach.

In other news, I've implemented the last stand skirmish game mode, squashed a bunch of bugs, and been chipping away at the voice script. Well, back to it.

Sydney Harbour

The Scotsmen make their first landing on the Australian mainland at Sydney harbour. Here the local Scottish community have been having trouble, with the Australians wanting to tear down their newly built haggis factory, claiming it's blocking traffic on the Sydney harbour Bridge. Luckily for them, Alfredo has come to the rescue.

In this level the player will have to contend with enemies arriving by boat, as well as enemies coming across the bridge, where they have a direct route to the haggis factory. Fortunately the pile-up of cars on the bridge provides good cover for the Scottish defenders. The high retaining walls also make for a good vantage point to pick off enemies arriving by boat, although the player will have to venture down to the beaches if they want to hold several of the map's oat fields.

This level also introduces the Australian hero character, Sir Donald Bradman. His skill with a cricket bat enables him to deflect any projectiles that come his way. Putting him next to, or in front of other hero characters can be a useful tactic, as he can protect them from incoming projectiles too. He can even reflect projectiles at nearby enemies to do additional damage. Of course, his cricket bat also makes a deadly weapon when it comes to close combat. However, he isn't quite fast enough to block bullets, so he should still be kept in cover when possible.

Australia

At long last, the Scotsmen arrive at my own home country, Australia. Well, sort of, because the first Australian map doesn't take place on the mainland. Instead, the Scotsmen stop off at a small sandy archipelago in the midst of the Great Barrier Reef, where the Australian government has demanded the removal of a haggis factory set up to feed any Scottish tourists who may pass by.

This level is almost all water, with only a few small islands, and some shallows connecting them. Nothing grows on them except palm trees and oats (strangely enough). Enemies arrive from all directions via motorboats. The player would be wise to target the boats, while the enemies are clumped close together and in the open. Although there is only a small area to defend, the enemies can approach from any direction and quickly get close to the haggis factory, meaning the player won't simply be able to defend a front line while leaving their rear unguarded. The Great Barrier Reef introduces the first two Australian enemies, the Kangaroo Rider, and the Budgie Smuggler.

The kangaroo rider is a fast moving ranged unit with a twist. Unlike regular projectiles, the boomerangs that they throw don't follow a normal arc. Instead they throw them beyond their target, and they then hit them on the way back. This makes them very effective against units in cover. Their downside is their cost, mediocre health, and the fact that they present a large target, making them vulnerable to otherwise inaccurate ranged attacks such as the porridge cannon, turnip turret and plain old porridge bowls.

The budgie smuggler is unique among enemies in their ability to swim. This makes defending on water maps much more difficult, as they can traverse bodies of water that would otherwise serve to guard the player's flanks. On The Great Barrier Reef map in particular, this ability enables them to reach the haggis factory in seconds from any point on the map, where other units would have to take the long way around, using the shallows. In combat they are a melee unit of average ability, although they do cost slightly more than similar units such as the Frenchman, to take into account their swimming ability.

Progress Report

Whit like are ye la (ds/sses)?

I've been having some troubles with the Unity editor since upgrading to the latest version, so I cannae do the usual weekly showcase of the latest enemies or levels. Instead, I'll use this as an opportunity to do an update on the general progress of the game.

Firstly, the campaign system is now fully functional. It's now possible to play through the currently created levels in order with upgrade screen between levels, complete with saving and loading. For each level I've set up the enemy AI controller with its wave pattern and recruitment point caps etc. to give a decent difficulty curve. So essentially the campaign is fully playable, until you get to the levels I haven't created yet. Also on the campaign side, the tutorial is done (except for voice acting).

Skirmish mode also is fully working, with all the settings available in the skirmish menu reflected in game (except Last Stand mode, which I've yet to implement). I've also made the options menu, which is fully functional, although not yet skinned properly. Main menu also is complete apart from skinning.

The existing units are somewhat balanced, although this will require more testing. I've set up a system that after each game generates a report detailing how well each unit performs (essentially it reports how much damage the average unit of a particular type dealt in the game, divided by the unit's cost). Of course this isn't the whole story, as some units have other value than the damage they deal, such as slow, bulky units drawing fire to allow lighter units to do more damage, etc. But it does give a good ballpark figure. Ideally I'd like to set up a system where the report is automatically sent to an email address after each game, so that I can collect a ton of data once the game goes into early access, which will help me balance the game.

So, what's still left to do?

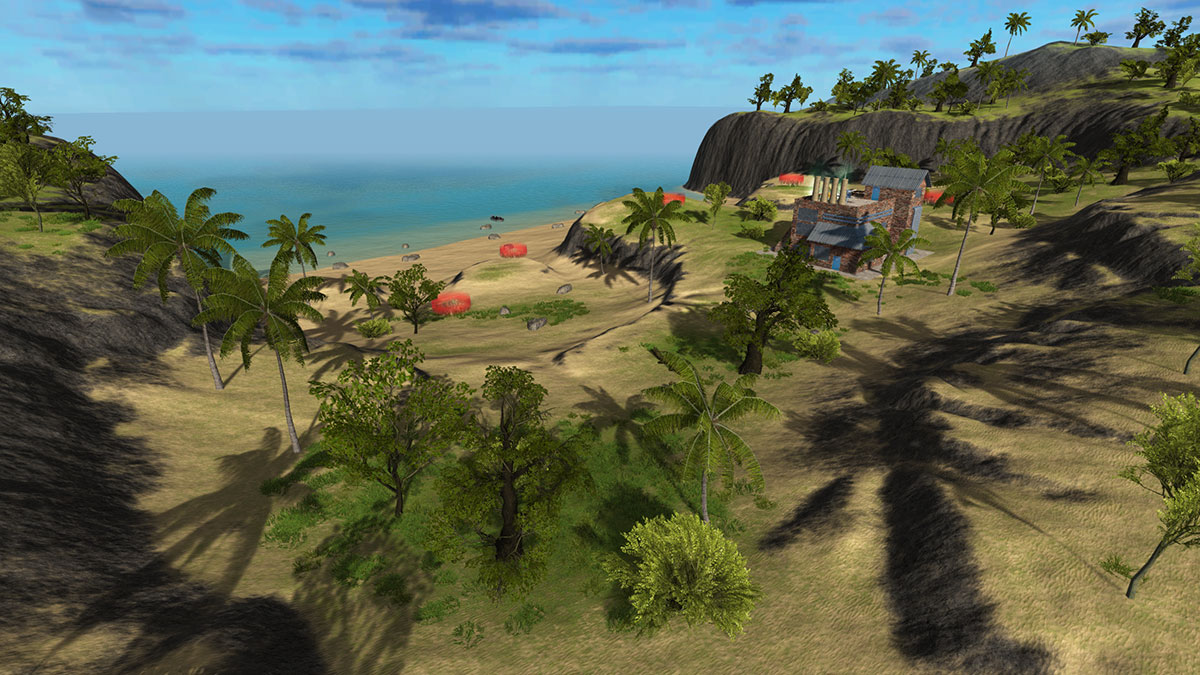
Obviously there's more maps, enemies and towers to make. Then all the maps have to be lightmapped (which looks like it'll be a nightmare with Unity's new lightmapper).

All the voice acting also still needs to be done (Have done a little of the script, but it's still a long way from done). There's also still a little bit of music and sound effect work remaining.

I haven't touched the multiplayer system in months, so that's going to need a shake up to make sure everything I've done since then is working in multiplayer. I also need to do the multiplayer menus.

Although no official date has been set, we're aiming for an Early Access release in March next year. Now I'd better get back to work :P

Cleopatra and the Aswan Dam

In the South of Egypt, at the head of the Nile River lies the Aswan Dam. Constructed in 1902, it is essential for Egypt's economy, generating electricity, and allowing the flooding of the river to be controlled. Of course, Scotsmen have a divine right build haggis factories where they please, so none of this means anything.

In addition to this blog post, you can see a gameplay video taking place on this map at - https://www.youtube.com/watch?v=12Hbb0xbWdU

In this map, the player starts on the high ground in the South-west corner. Enemies can approach either through the marshy area below the dam wall, or across the causeway. To capture the three oat fields in the swamp, the player will have to navigate and protect the islands and shallows. Two aoat fields are near the haggis factory, providing a good fall-back position, and the final oat field is across the causeway.

Also, it would seem I've been remiss in neglecting to introduce the Egyptian hero character, Cleopatra, Queen of the Nile.

Fighting with a bow in ancient Egyptian style, Cleopatra provides some much needed long range fire, able to shoot the furthest of all the hero characters. In melee she fights with a dagger, although she should be kept away from prolonged combat, as she also has the lowest hit points of all the hero characters.

Valley of Kings

Valley of Kings is the third Egyptian map. The Scotsmen barricade themselves inside the ancient Temple of Hatshepsut, where a haggis factory has recently been completed. Angry at having their ancient tomb defiled, the Egyptians launch a vicious assault, joined by the mummy and desert tribesman, who make their debut in this level.

The player starts in a very good position, with only one narrow doorway giving the enemies access to the inside of the temple. Beyond that is a single ramp leading to the upper level, which will be a very effective defensive point. However, only two oat fields are accessible from here. To gain the second two, the player will have to move onto the second level. The second level is still reasonably defensible, although it has three access points (the middle ramp, a stairway on the right, and the encroaching sand dune on the left). The final two oat fields are on the ground to the right of the temple, and will be more difficult to defend.

What Could be More Exciting than Menus?

So, something a bit different this week. I've been doing a lot of work on the menus lately, so I'd like to show you (and hopefully get feedback on) the upgrade and skirmish menus, as they are in their current W.I.P state.

The upgrade menu is displayed after each level in the campaign. Here the player can upgrade the stats of their Scotsmen and towers. Since there's more stuff than in the original game, I've organised it into tabs for each item. Clicking the tab of the item you want to view available upgrades for brings that tab to the front, as you would expect.

One of the things people mentioned about the upgrade screen in the original game was that it would be nice to see the actual values of the stats, rather than just an indicator of what level they're at, which is why I've decided to display those stats over the upgrade bar, as well as an indicator of how much the next upgrade level will improve the stats next to the upgrade button.

The blue part of the upgrade bars indicates what level the stat was at already from previous upgrades. The green part represents upgrades purchased in the current session. Any upgrades purchased in the current session can be removed by right clicking the upgrade button, or all of them can be reset by clicking the reset button in the top left hand corner. However, upgrades that have previously been purchased (the blue bars) cannot be reset, so think hard about which upgrades you'd like to purchase before clicking the “Next” button.

On the right is a list of towers that can be unlocked. Some are not available until a certain point in the game, so have their icons hidden by a lock icon. Others are available for purchase, and have the cost displayed next to them. Clicking the padlock button unlocks them. The blue open padlocks indicate towers that have been unlocked previously, and green open padlocks represent tower that have been unlocked in the current session. You can change your mind about any towers you've unlocked in the current session by right clicking the green padlock, or clicking the reset button.

Instead of upgrade points, this time I'm using money for the upgrade menu. All money earned (whether it was spent or not) in the previous level is added to the money available for purchasing upgrades. Any money left over will be rolled over until the next time the player visits the upgrade screen. Using money instead of upgrade points enables me to make more powerful upgrades more expensive, and make it cost more for each successive upgrade on a single stat, which will encourage balanced upgrading rather than maxing out certain stats while leaving others on level one. Oh and another thing, the money indicator in the top right corner is just temporary. Haven't made a graphic for that yet.

The options down the left side of the skirmish menu are much the same as those in the first game. The only addition there is the “Game Type” option. This will give the option of a standard game, or the new “Last Stand” mode where the player begins with a heap of Scotsmen, porridge and money, and a few minutes at the start to get their defences set up. However, they will be unable to recruit additional Scotsmen, so they will have to hold out with what they've got and try to outlast the enemy.

On the right is a picture of the currently selected map, and a short description, to make it easier for the player to decide which map to play on.

The bottom panel is where the player can choose which towers, heroes and enemies should be available in the match. Clicking on any of the icons toggles between it being enabled, or disabled (indicated by turning red). The towers are organized into tabs for Scottish towers, and Foreign towers. The enemies are organized into six tabs, one for each country. As well as the regular enemies, the player can enable bosses as well.

For both screens I'm going to put an overlay of spilt whisky and porridge stains on the tab panels, since they look un-Scottishly clean at the moment. I'm still tossing up whether to use different background images for each menu or not. My current intention is to have an animation where all the current menu stuff scrolls off the top of the screen while the next menu is loading, and then have that scroll into place from the bottom of the screen. This would hide the scene loading and make it more seamless, but I'm not sure if people might think its a bit cheap using the same background for all the menus. Opinions on this and anything else are very welcome.

Warriors of Egypt

As the Scotsmen blaze their way across Egypt, the Egyptians realize that they must find another way to repel the invasion. So using dark ancient sorcery, they bring their ancient dead back to life, leaving the Scotsmen to fight a horde of undead mummies. To make matters worse, bands of desert tribesmen have ridden their camels to the Egyptians' aid. These are two enemies not to take lightly.

Already having died once, the mummy is incredibly difficult to kill a second time. They have the highest health of any non-boss character, and are powerful attackers. But they are also one of the slowest enemies, and not cheap either. Their massive health enables them to soak up a lot of damage, drawing fire away from lighter enemies. They can be effectively defeated with the fondue hose or a point blank blast of the porridge cannon, or with the haggis catapult. Other weapons will take a lot longer to bring them down.

Desert tribesmen combine speed with a rapid fire attack, making them extremely deadly. They can easily close in on unguarded farmers or vulnerable towers and take them out with their AK-47. Against anything not well covered they can win hands down. However, their shots aren't very accurate, and the direct trajectory of gun weapons make them ineffective against units in cover. They are also a large target, making them easy to hit even with inaccurate weapons. This is one enemy where a plain old Scotsman behind a barricade is an effective counter.

Cairo

After having conquered the Nile Delta, the Scotsmen push ahead with their Egyptian campaign, launching an assault on the capital, Cairo.

The Scotsmen have set up their haggis factory in a market square close by the Nile River. The starting area contains two oat fields, and has only two narrow entrances, making a good inner defensive area to fall back to if things go bad. To the north is one oat field on the riverbank, where enemies will arrive by boat. It is a wide front to defend, but enemies in boats are easy targets. The other three oat fields are along a street to the south. On the West end of the street is an area of parkland, and on the East is a narrow alleyway, both of which contain enemy spawn zones at their far ends.

I've also been making a few changes to the basic game mechanics lately. The mechanic of constructing the factory had been bothering me for a while. It essentially meant that each level could go for an unlimited amount of time if the player chose not to work on the factory, which led to the player being able to stockpile ridiculous amounts of money and spam heaps of powerful towers. The only way to answer this was to have the enemy keep coming faster and faster, which of course leads to lag once you get hundreds of units on screen at once. So I'm eliminating that mechanic, going back to a system more like the first game, where the enemy would get a certain number of recruitment points to use in each level, with the player having to hold out until they've defeated all the enemies. The back story will now be that Alfredo is travelling to where Scottish expatriates have already constructed haggis factories, which the locals are determined to tear down.

Flying Carpets

So I know I still haven't done the Italian tower yet (I need to have pasta for dinner sometime so I can photograph the pasta portal texture), but I'll press on and talk about the Egyptian tower today regardless. The Egyptian tower is the Magic Carpet, an ingenious way of giving your Scotsmen an edge over enemies.

When a Scotsman steps onto a magic carpet, it ascends into the air, where thanks to the elevation, the rider will receive a range and attack boost (and enemies will need to get closer to be able to hit them too). The height also makes it easier to hit enemies in cover, since the porridge bowl can be thrown over the cover object. The rider is also completely inaccessible to enemy melee units, letting them get on with the job of throwing porridge unfettered.

The catch is that the rider is an open target to longer ranged enemies, such as the Egyptian God, so you'll need to make sure you have other towers capable of taking them out before they can knock the Scotsman off his carpet.

At only $25 each, the Magic Carpet is the cheapest tower available, but if used effectively, can be well worth the cost.

Gods (and slaves) of Egypt

The first two enemies the Scotsmen encounter in Egypt are the Egyptian slave, and the Egyptian god. Thought they may come from the same time period, they have vastly different combat abilities.

The Egyptian slave goes into battle completely unarmed, relying solely on hand to hand combat. While quite fast moving, they are easy to defeat in melee one on one. However, being cheap, the enemy can send a lot of them into battle quickly, so they can easily overwhelm you with numbers. Because of their low health, they can generally be defeated before they get close enough to attack, simply using your Scotsmen's default porridge bowl throwing attack.

The Egyptian god is almost the complete opposite of the slave. While the slave is a cheap cannon fodder unit, the god is an expensive, elite unit, combining a very long range with high health and strong attack. Their main weakness is their speed (they have to walk like an Egyptian after all), making them easy targets for golf tees and haggis catapults, which are the only towers that can shoot further than them. They are also quite accurate, making them an effective counter to front line towers such as the porridge cannon or fondue hose. Oatbag barricades on the front line, coupled with golf tees or haggis catapults placed further back are the best way to defeat them with minimal casualties.

The Nile Delta

Having spent days without a fight as they crossed the Mediterranean, the Scotsmen finally arrive in Northern Egypt, at the Nile Delta. The fertile land makes it a perfect spot to grow oats and sheep lungs to produce haggis with, so they disembark to construct their first haggis factory.

The delta is a swampy area, with many islands separated by water. Traversable shallows link some of the islands, providing good defensive positions, and there are plenty of rocks and fallen logs to use as cover. Broadly, the level is set out in a V-shape, with the enemies starting at the top, and the player at the bottom. The further forward the player advances, the more oat fields they will be able to harvest, but the wider front they will have to defend, and the less time they'll get to pick off newly spawned enemies with long ranged weapons before they reach the player's line. The level introduces the Egyptian slave, and Egyptian God. The Egyptian slave is a cheap melee unit that sits between the Frenchman and the Nun in cost, speed and combat abilities, while the Egyptian god is an elite ranged unit that fires a bow and arrow with good range and accuracy. More on these in a future post. 

I've also spent some time this week working on splash effects. When units walk through shallow water, or a projectile lands in water, a particle and sound effect play, which I think really adds to the immersion. I've also sourced some more sound effects, so the battles are starting to take on that chaotic atmosphere that I'm after.

Haggis Catapults and Turnip Turrets

Greetings fellow humans.

So, I had been planning on showing the Italian tower, the plumber pipes today. The plumber pipes were essentially Mario pipes that let you instantly transport Scotsmen between distant parts of the map. For obvious reasons, I've been a little unsure of this tower, and while Flappy Bird may have gotten away with it, I really don't want to risk getting in copyright trouble. So I've decided to replace the plumber pipes with the “Pasta Portal,” which essentially does the same thing. I haven't made it yet though, so instead, this week I'll be showing off two of the towers making a return from the previous game: the Haggis Catapult and the Turnip Turret.

The haggis catapult throws exploding haggis over a long range, enabling you to decimate the enemy before they can reach your other units. The projectiles do splash damage, making it perfect for taking out groups of enemies (and incidentally, making it the only long range counter to the gladiator, whose shield effectively protects him from all other attacks apart from Fondue Hose, Whisky Bar and melee attacks). The splash damage also nullifies the benefits of any cover enemies are using.

On the downside, it has a low rate of fire, and its weight makes it very slow to rotate to face new targets, making it less effective for defending a wide front than its other long ranged cousin, the golf clubs. It also has a minimum range, and provides no cover, so it will quickly fall to ranged and melee units alike if not supported with other defences

The turnip turret is the pinnacle of technology in the Scottish arsenal. Its high rate of fire and ability to rotate quickly enable it to defend a large area from approaching melee enemies. It can fire further than Scotsmen, and most enemies, although its accuracy makes it less effective against more distant enemies, particular those in cover.

It is however, the most expensive tower, and with its low hit-points, it is something of a glass cannon. While it provides decent cover from the front, a lucky shot, or a hit from the side can easily take out the operator, enabling melee units to close in and destroy it very quickly. The player will need to make sure it is placed in a defensible position, and back it up with nearby Scotsmen to take over if the operator is killed. Placing it near a fondue hose or whisky bar will help protect it from melee units when it is not manned.

Julius Caesar

Julius Caesar finds himself facing off against a gladiator rebellion one day at the Roman Colosseum. By an extraordinary coincidence, at that very moment, an airship full of Scotsmen arrives with the intention of building a haggis factory in the Colosseum. Caesar agrees to aid the Scotsmen in their mission, if they help him defeat the uprising. And that is how the Scotsmen acquire their third hero character during their World Tour. True story.

Julius Caesar is an expert in ranged skirmishes with enemy ranged units, as his shield protects him from enemy projectiles, and he can throw his javelin further and more accurately than regular Scotsmen can throw their porridge bowls. In melee he is less effective than Alfredo or Joan of Arc, but can still hold his own, fighting with a short sword. The best strategy is to put him somewhere that he has protection from melee combat, while still being in the thick of the projectile combat.

When in Rome - Build a Haggis Factory

As they travel further into Italy, the Scotsmen come across one of the world's most famous ancient landmarks – the Roman Colosseum. How could they not build a haggis factory there. Here they add a new hero character to their party, Julius Caesar (who I'll cover in the next post).

The player starts in the middle of the Colosseum, where they are sitting ducks against enemies on the higher levels. Also, only two of the oat fields are on the arena floor, so the player will need to move quickly to establish a foothold on the upper levels. There are nine entrances from which enemies spawn, so the Scotsmen will find themselves under assault from all sides. Fortunately, the uppermost levels on either side of the Colosseum have an oat field each, and no entrances, so the player can easily barricade some Scotsmen up there to hold them. The two oat fields on the second highest level will be the most difficult to hold. The newly unlocked Italian tower, the plumber pipe, will be vital in transporting Scotsmen quickly from the arena floor to the upper levels without having to go through enemy controlled areas (more on that another time).

I haven't quite finished with this level yet. I think it could do with some extra colour variation, which I'll add once I've done the light-mapping by manually painting some extra color onto the lightmap, and perhaps adding some more decals. Any suggestions are welcome as well.

Its a Spicy Meat-A-Ball

It wouldn't be Italy without someone to cook the pasta or pizza or ravioli or lasagne etc. That's why the first enemy the Scotsmen encounter when they enter Italy is the chef.

The chef carries a pot full of spicy meat-a-balls to throw at the Scotsmen. They fire five meatballs in one shot, allowing them to damage several Scotsmen if they are too closely grouped. However, they can't throw as far as a Scotsman, and are slow to average in speed. They have high health for a ranged unit.

The Scotsmen also encounter gladiators throughout Italy. (Because the game takes place in all time periods at once for some reason). They are especially common in level 6 – Colosseum.

Gladiators are uniquely resistant to frontal ranged attacks because of their shield. Any projectiles that hit it bounce off harmlessly. It doesn't provide protection against exploding projectiles however, and it does slow them down somewhat, making them very vulnerable to the haggis catapult. They can do considerable damage in melee, so killing them before they reach your Scotsmen should be a high priority.

Its-a Venice

The Scots arrive in the canal city of Venice for their first encounter with the Italians. Here they will face two new enemies, the spicy-meat-a-ball throwing Italian chef, and the gladiator, whose shield protects him from frontal ranged attacks (more details next time). They will also encounter the first instance in the game of enemies riding boats.

While on boats, enemies will only be able to use ranged attacks against the Scotsmen, and will have nowhere to run and hide, making it a perfect opportunity to pick them off. The boats will travel to set locations, where the enemies will disembark.

In Venice, the player starts on an island with two oat fields. Two bridges connect the island to the rest of the map, and there is one landing site where enemy boats can land on the island. The other four oat fields are scattered throughout the rest of the map, in locations of varying difficulty to access and defend. The player will have to strategically defend the five landing zones as much as possible, and use the bridges as choke points when enemies do manage to establish themselves on the land.

The map provides some cover in the form of parked cars, and crates and barrels outside shops, although these will likely be of more use to the enemy than the Scotsmen. The long, straight approach of the boats along the canals provides great opportunity to pick off enemies with golf clubs, and having multiple enemies crammed into each boat will make area effect weapons like the porridge cannon and haggis catapult highly effective.