Cleopatra and the Aswan Dam

In the South of Egypt, at the head of the Nile River lies the Aswan Dam. Constructed in 1902, it is essential for Egypt's economy, generating electricity, and allowing the flooding of the river to be controlled. Of course, Scotsmen have a divine right build haggis factories where they please, so none of this means anything.

In addition to this blog post, you can see a gameplay video taking place on this map at - https://www.youtube.com/watch?v=12Hbb0xbWdU

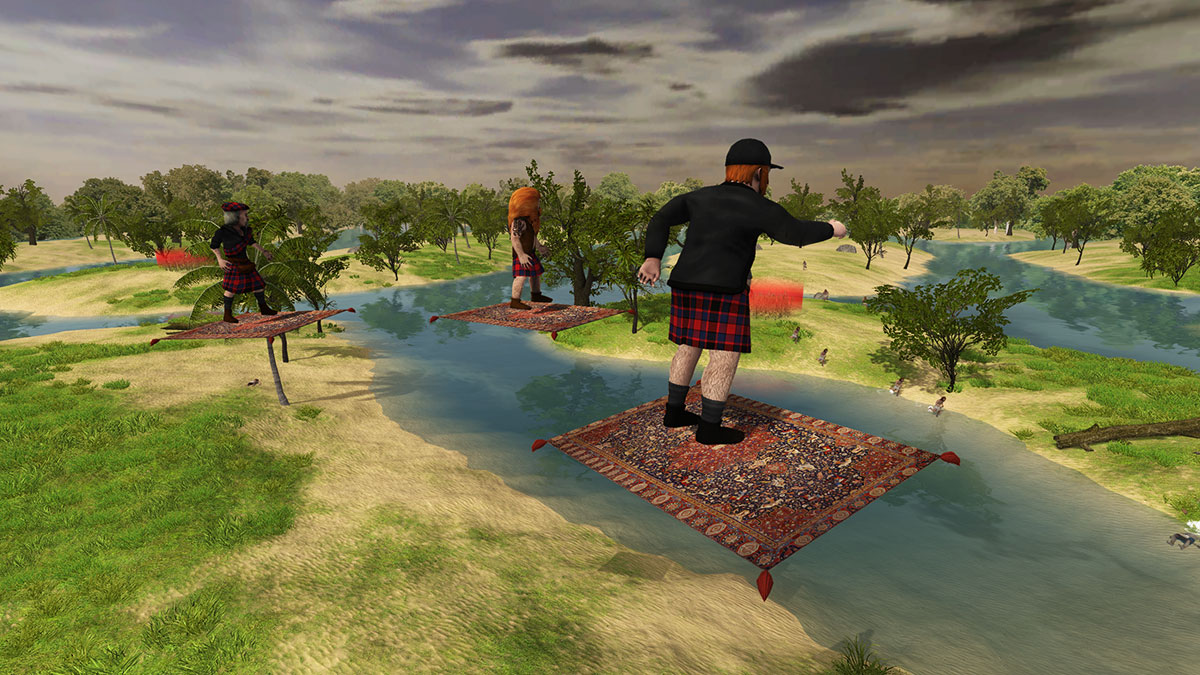
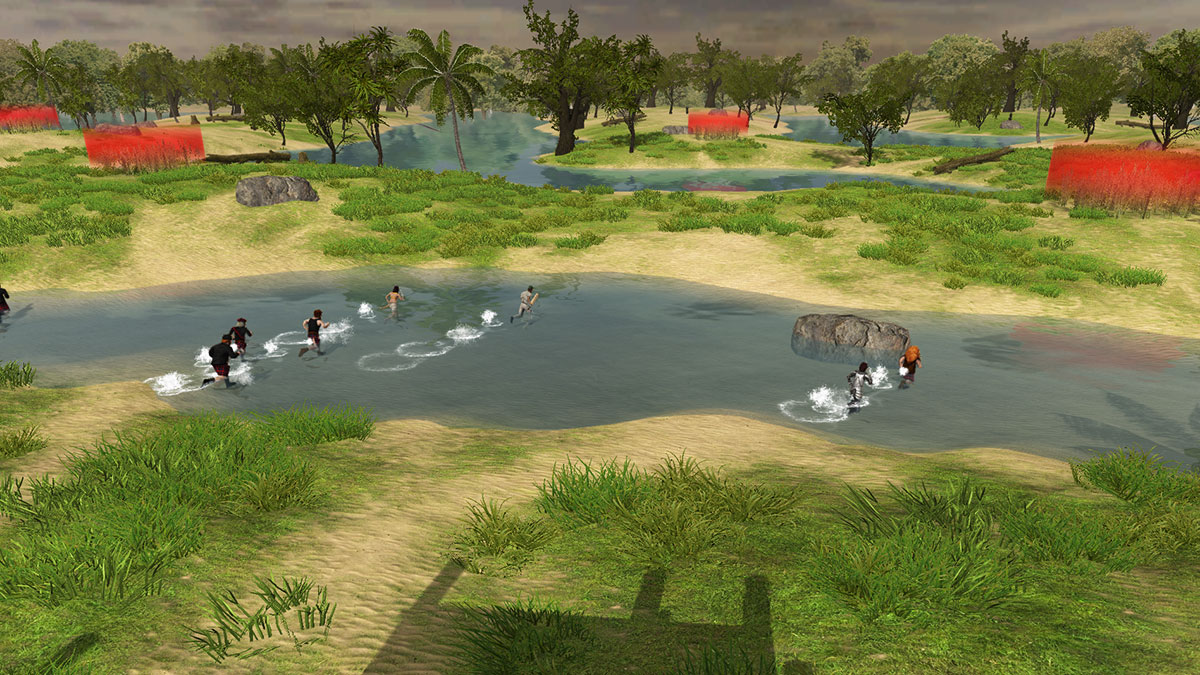
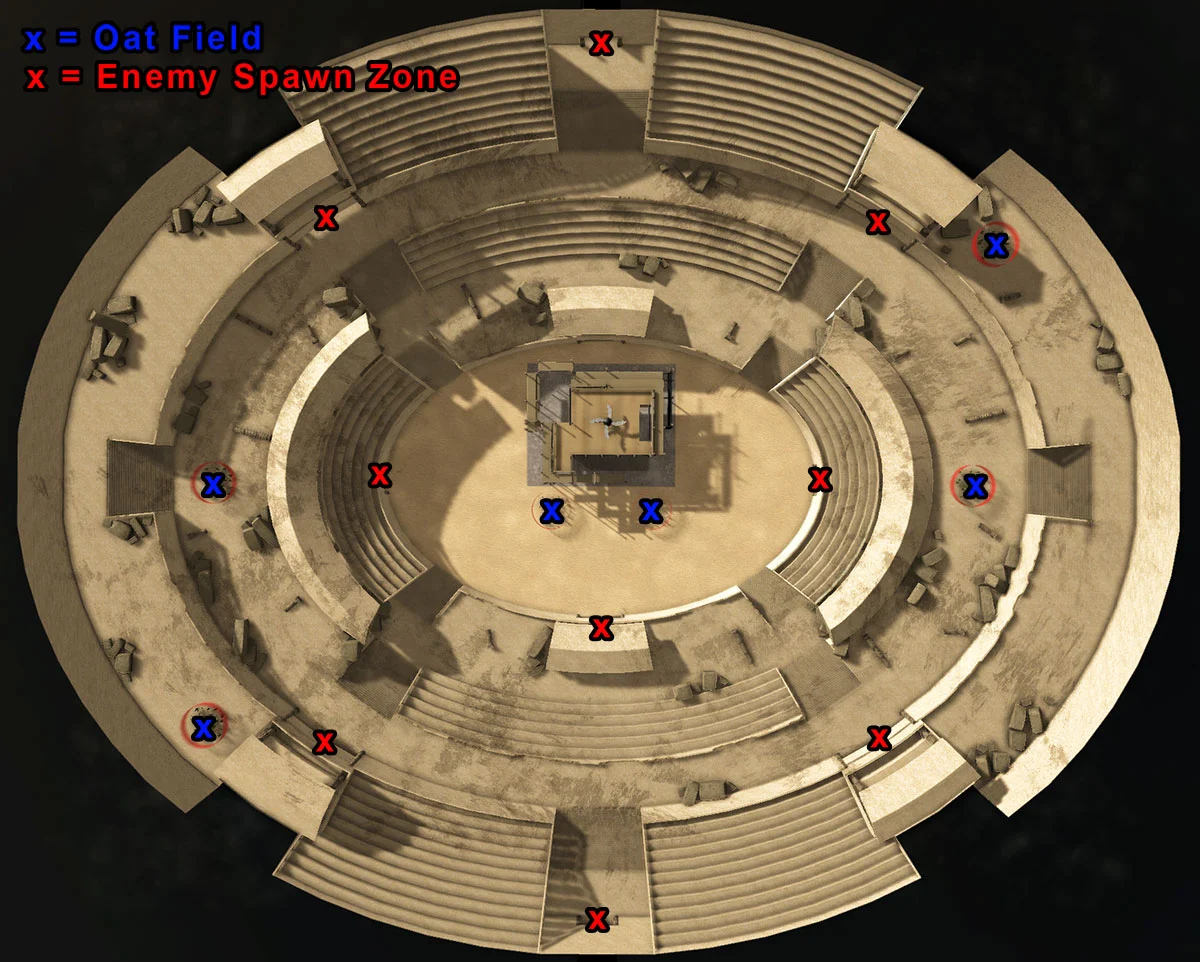
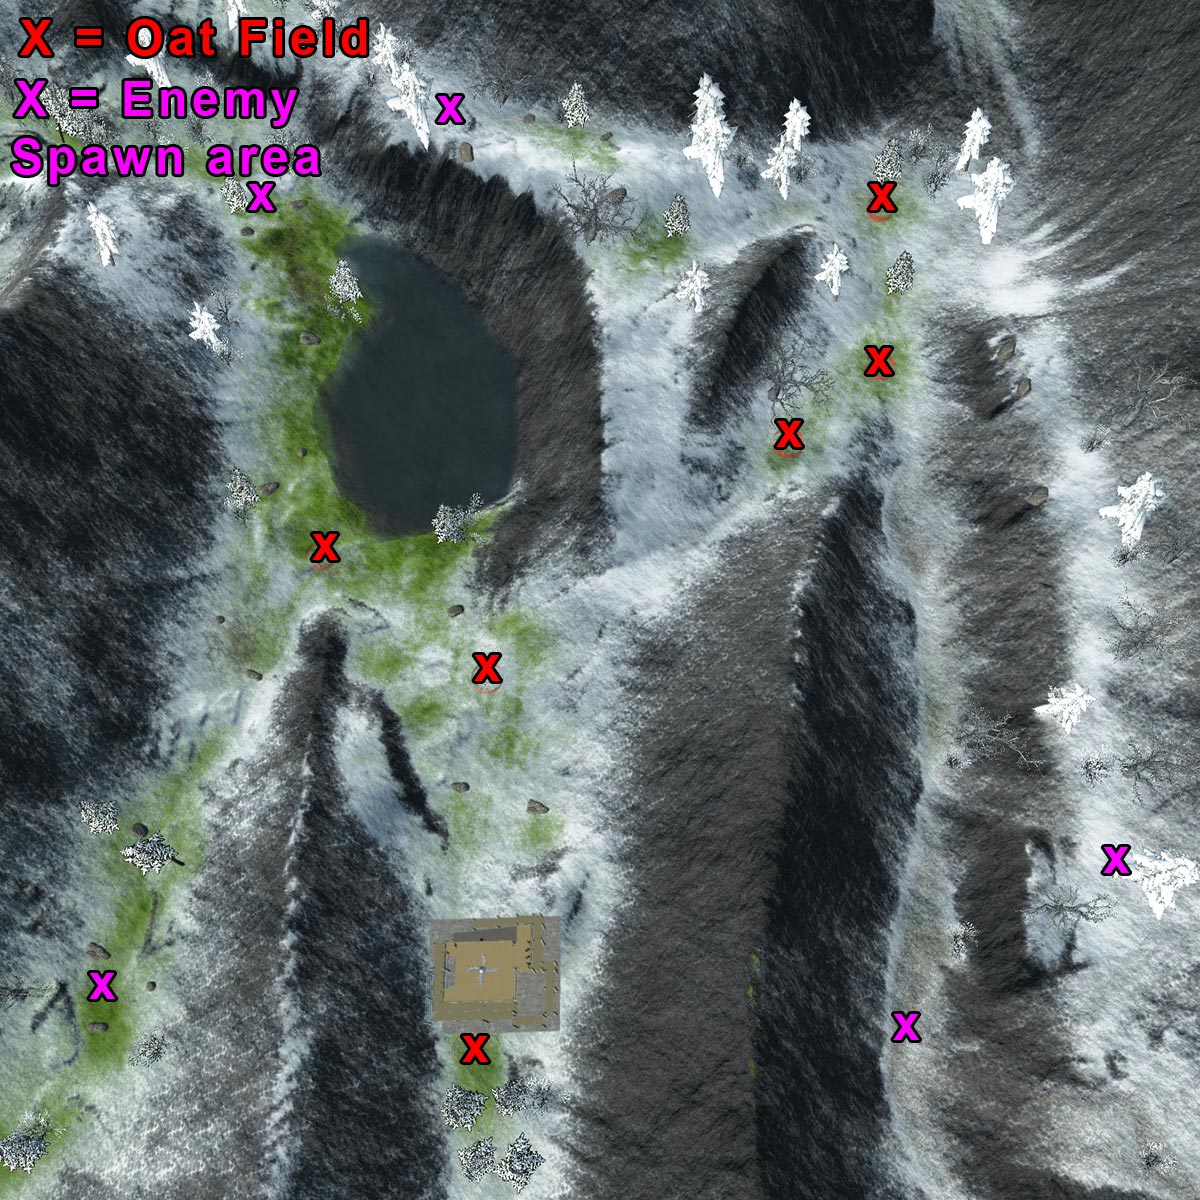
In this map, the player starts on the high ground in the South-west corner. Enemies can approach either through the marshy area below the dam wall, or across the causeway. To capture the three oat fields in the swamp, the player will have to navigate and protect the islands and shallows. Two aoat fields are near the haggis factory, providing a good fall-back position, and the final oat field is across the causeway.

Also, it would seem I've been remiss in neglecting to introduce the Egyptian hero character, Cleopatra, Queen of the Nile.

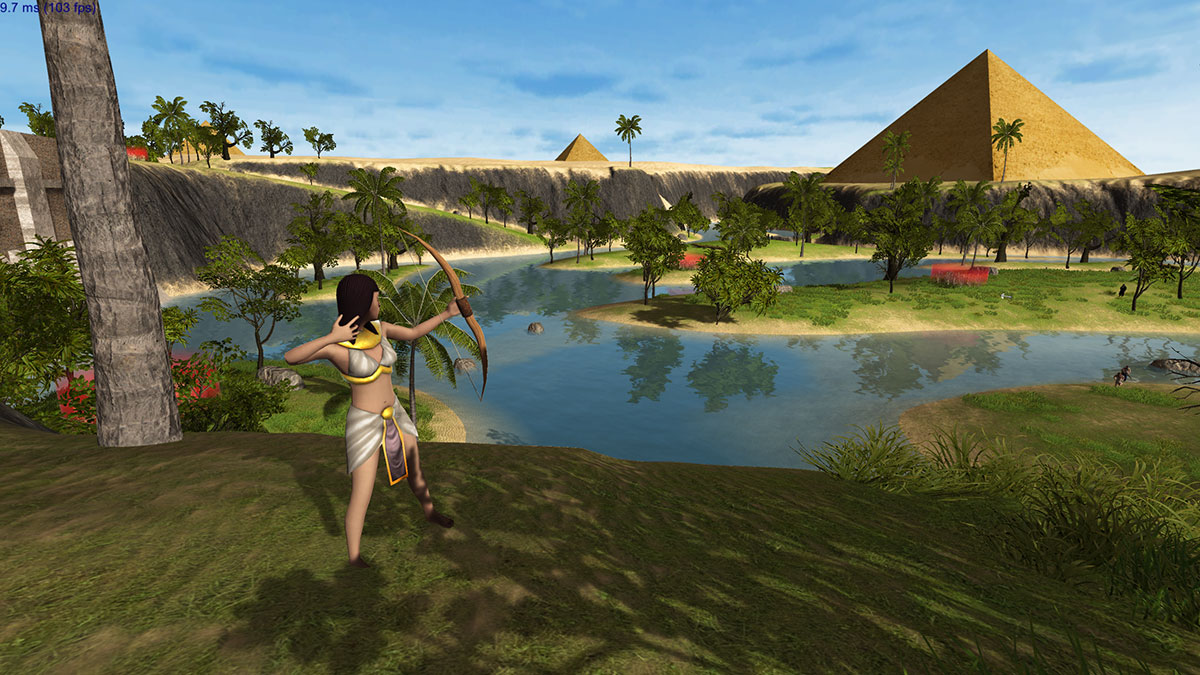
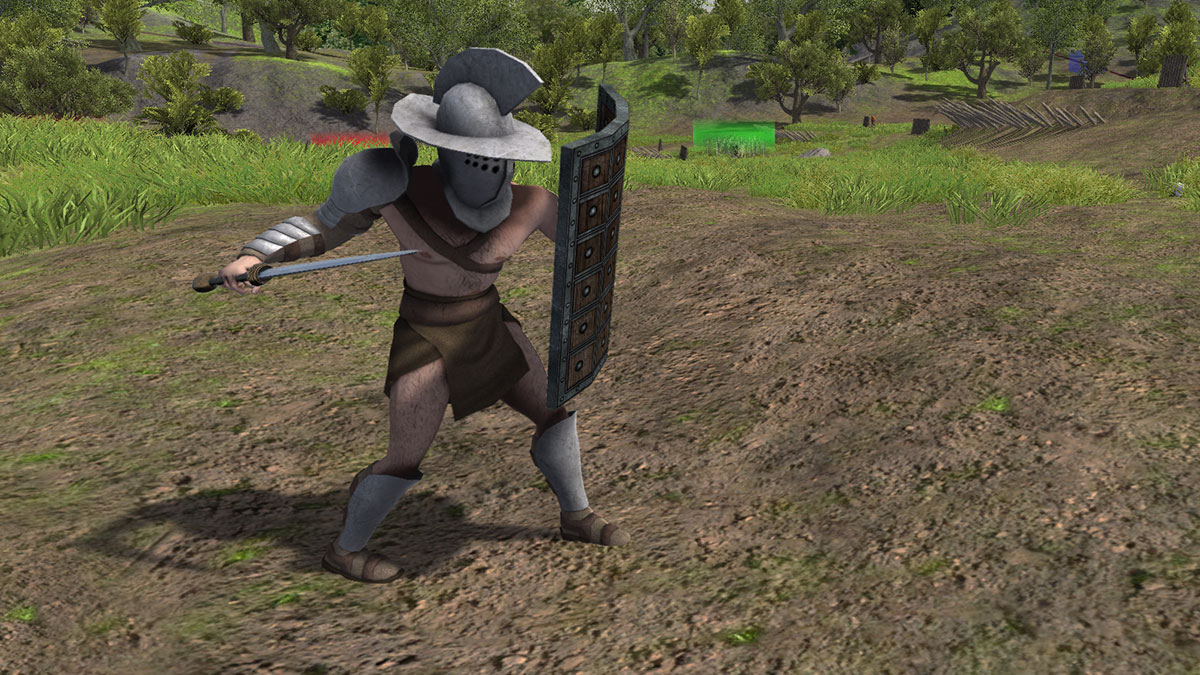
Fighting with a bow in ancient Egyptian style, Cleopatra provides some much needed long range fire, able to shoot the furthest of all the hero characters. In melee she fights with a dagger, although she should be kept away from prolonged combat, as she also has the lowest hit points of all the hero characters.

Valley of Kings

Valley of Kings is the third Egyptian map. The Scotsmen barricade themselves inside the ancient Temple of Hatshepsut, where a haggis factory has recently been completed. Angry at having their ancient tomb defiled, the Egyptians launch a vicious assault, joined by the mummy and desert tribesman, who make their debut in this level.

The player starts in a very good position, with only one narrow doorway giving the enemies access to the inside of the temple. Beyond that is a single ramp leading to the upper level, which will be a very effective defensive point. However, only two oat fields are accessible from here. To gain the second two, the player will have to move onto the second level. The second level is still reasonably defensible, although it has three access points (the middle ramp, a stairway on the right, and the encroaching sand dune on the left). The final two oat fields are on the ground to the right of the temple, and will be more difficult to defend.

What Could be More Exciting than Menus?

So, something a bit different this week. I've been doing a lot of work on the menus lately, so I'd like to show you (and hopefully get feedback on) the upgrade and skirmish menus, as they are in their current W.I.P state.

The upgrade menu is displayed after each level in the campaign. Here the player can upgrade the stats of their Scotsmen and towers. Since there's more stuff than in the original game, I've organised it into tabs for each item. Clicking the tab of the item you want to view available upgrades for brings that tab to the front, as you would expect.

One of the things people mentioned about the upgrade screen in the original game was that it would be nice to see the actual values of the stats, rather than just an indicator of what level they're at, which is why I've decided to display those stats over the upgrade bar, as well as an indicator of how much the next upgrade level will improve the stats next to the upgrade button.

The blue part of the upgrade bars indicates what level the stat was at already from previous upgrades. The green part represents upgrades purchased in the current session. Any upgrades purchased in the current session can be removed by right clicking the upgrade button, or all of them can be reset by clicking the reset button in the top left hand corner. However, upgrades that have previously been purchased (the blue bars) cannot be reset, so think hard about which upgrades you'd like to purchase before clicking the “Next” button.

On the right is a list of towers that can be unlocked. Some are not available until a certain point in the game, so have their icons hidden by a lock icon. Others are available for purchase, and have the cost displayed next to them. Clicking the padlock button unlocks them. The blue open padlocks indicate towers that have been unlocked previously, and green open padlocks represent tower that have been unlocked in the current session. You can change your mind about any towers you've unlocked in the current session by right clicking the green padlock, or clicking the reset button.

Instead of upgrade points, this time I'm using money for the upgrade menu. All money earned (whether it was spent or not) in the previous level is added to the money available for purchasing upgrades. Any money left over will be rolled over until the next time the player visits the upgrade screen. Using money instead of upgrade points enables me to make more powerful upgrades more expensive, and make it cost more for each successive upgrade on a single stat, which will encourage balanced upgrading rather than maxing out certain stats while leaving others on level one. Oh and another thing, the money indicator in the top right corner is just temporary. Haven't made a graphic for that yet.

The options down the left side of the skirmish menu are much the same as those in the first game. The only addition there is the “Game Type” option. This will give the option of a standard game, or the new “Last Stand” mode where the player begins with a heap of Scotsmen, porridge and money, and a few minutes at the start to get their defences set up. However, they will be unable to recruit additional Scotsmen, so they will have to hold out with what they've got and try to outlast the enemy.

On the right is a picture of the currently selected map, and a short description, to make it easier for the player to decide which map to play on.

The bottom panel is where the player can choose which towers, heroes and enemies should be available in the match. Clicking on any of the icons toggles between it being enabled, or disabled (indicated by turning red). The towers are organized into tabs for Scottish towers, and Foreign towers. The enemies are organized into six tabs, one for each country. As well as the regular enemies, the player can enable bosses as well.

For both screens I'm going to put an overlay of spilt whisky and porridge stains on the tab panels, since they look un-Scottishly clean at the moment. I'm still tossing up whether to use different background images for each menu or not. My current intention is to have an animation where all the current menu stuff scrolls off the top of the screen while the next menu is loading, and then have that scroll into place from the bottom of the screen. This would hide the scene loading and make it more seamless, but I'm not sure if people might think its a bit cheap using the same background for all the menus. Opinions on this and anything else are very welcome.

Warriors of Egypt

As the Scotsmen blaze their way across Egypt, the Egyptians realize that they must find another way to repel the invasion. So using dark ancient sorcery, they bring their ancient dead back to life, leaving the Scotsmen to fight a horde of undead mummies. To make matters worse, bands of desert tribesmen have ridden their camels to the Egyptians' aid. These are two enemies not to take lightly.

Already having died once, the mummy is incredibly difficult to kill a second time. They have the highest health of any non-boss character, and are powerful attackers. But they are also one of the slowest enemies, and not cheap either. Their massive health enables them to soak up a lot of damage, drawing fire away from lighter enemies. They can be effectively defeated with the fondue hose or a point blank blast of the porridge cannon, or with the haggis catapult. Other weapons will take a lot longer to bring them down.

Desert tribesmen combine speed with a rapid fire attack, making them extremely deadly. They can easily close in on unguarded farmers or vulnerable towers and take them out with their AK-47. Against anything not well covered they can win hands down. However, their shots aren't very accurate, and the direct trajectory of gun weapons make them ineffective against units in cover. They are also a large target, making them easy to hit even with inaccurate weapons. This is one enemy where a plain old Scotsman behind a barricade is an effective counter.

Cairo

After having conquered the Nile Delta, the Scotsmen push ahead with their Egyptian campaign, launching an assault on the capital, Cairo.

The Scotsmen have set up their haggis factory in a market square close by the Nile River. The starting area contains two oat fields, and has only two narrow entrances, making a good inner defensive area to fall back to if things go bad. To the north is one oat field on the riverbank, where enemies will arrive by boat. It is a wide front to defend, but enemies in boats are easy targets. The other three oat fields are along a street to the south. On the West end of the street is an area of parkland, and on the East is a narrow alleyway, both of which contain enemy spawn zones at their far ends.

I've also been making a few changes to the basic game mechanics lately. The mechanic of constructing the factory had been bothering me for a while. It essentially meant that each level could go for an unlimited amount of time if the player chose not to work on the factory, which led to the player being able to stockpile ridiculous amounts of money and spam heaps of powerful towers. The only way to answer this was to have the enemy keep coming faster and faster, which of course leads to lag once you get hundreds of units on screen at once. So I'm eliminating that mechanic, going back to a system more like the first game, where the enemy would get a certain number of recruitment points to use in each level, with the player having to hold out until they've defeated all the enemies. The back story will now be that Alfredo is travelling to where Scottish expatriates have already constructed haggis factories, which the locals are determined to tear down.

Flying Carpets

So I know I still haven't done the Italian tower yet (I need to have pasta for dinner sometime so I can photograph the pasta portal texture), but I'll press on and talk about the Egyptian tower today regardless. The Egyptian tower is the Magic Carpet, an ingenious way of giving your Scotsmen an edge over enemies.

When a Scotsman steps onto a magic carpet, it ascends into the air, where thanks to the elevation, the rider will receive a range and attack boost (and enemies will need to get closer to be able to hit them too). The height also makes it easier to hit enemies in cover, since the porridge bowl can be thrown over the cover object. The rider is also completely inaccessible to enemy melee units, letting them get on with the job of throwing porridge unfettered.

The catch is that the rider is an open target to longer ranged enemies, such as the Egyptian God, so you'll need to make sure you have other towers capable of taking them out before they can knock the Scotsman off his carpet.

At only $25 each, the Magic Carpet is the cheapest tower available, but if used effectively, can be well worth the cost.

Gods (and slaves) of Egypt

The first two enemies the Scotsmen encounter in Egypt are the Egyptian slave, and the Egyptian god. Thought they may come from the same time period, they have vastly different combat abilities.

The Egyptian slave goes into battle completely unarmed, relying solely on hand to hand combat. While quite fast moving, they are easy to defeat in melee one on one. However, being cheap, the enemy can send a lot of them into battle quickly, so they can easily overwhelm you with numbers. Because of their low health, they can generally be defeated before they get close enough to attack, simply using your Scotsmen's default porridge bowl throwing attack.

The Egyptian god is almost the complete opposite of the slave. While the slave is a cheap cannon fodder unit, the god is an expensive, elite unit, combining a very long range with high health and strong attack. Their main weakness is their speed (they have to walk like an Egyptian after all), making them easy targets for golf tees and haggis catapults, which are the only towers that can shoot further than them. They are also quite accurate, making them an effective counter to front line towers such as the porridge cannon or fondue hose. Oatbag barricades on the front line, coupled with golf tees or haggis catapults placed further back are the best way to defeat them with minimal casualties.

The Nile Delta

Having spent days without a fight as they crossed the Mediterranean, the Scotsmen finally arrive in Northern Egypt, at the Nile Delta. The fertile land makes it a perfect spot to grow oats and sheep lungs to produce haggis with, so they disembark to construct their first haggis factory.

The delta is a swampy area, with many islands separated by water. Traversable shallows link some of the islands, providing good defensive positions, and there are plenty of rocks and fallen logs to use as cover. Broadly, the level is set out in a V-shape, with the enemies starting at the top, and the player at the bottom. The further forward the player advances, the more oat fields they will be able to harvest, but the wider front they will have to defend, and the less time they'll get to pick off newly spawned enemies with long ranged weapons before they reach the player's line. The level introduces the Egyptian slave, and Egyptian God. The Egyptian slave is a cheap melee unit that sits between the Frenchman and the Nun in cost, speed and combat abilities, while the Egyptian god is an elite ranged unit that fires a bow and arrow with good range and accuracy. More on these in a future post. 

I've also spent some time this week working on splash effects. When units walk through shallow water, or a projectile lands in water, a particle and sound effect play, which I think really adds to the immersion. I've also sourced some more sound effects, so the battles are starting to take on that chaotic atmosphere that I'm after.

Haggis Catapults and Turnip Turrets

Greetings fellow humans.

So, I had been planning on showing the Italian tower, the plumber pipes today. The plumber pipes were essentially Mario pipes that let you instantly transport Scotsmen between distant parts of the map. For obvious reasons, I've been a little unsure of this tower, and while Flappy Bird may have gotten away with it, I really don't want to risk getting in copyright trouble. So I've decided to replace the plumber pipes with the “Pasta Portal,” which essentially does the same thing. I haven't made it yet though, so instead, this week I'll be showing off two of the towers making a return from the previous game: the Haggis Catapult and the Turnip Turret.

The haggis catapult throws exploding haggis over a long range, enabling you to decimate the enemy before they can reach your other units. The projectiles do splash damage, making it perfect for taking out groups of enemies (and incidentally, making it the only long range counter to the gladiator, whose shield effectively protects him from all other attacks apart from Fondue Hose, Whisky Bar and melee attacks). The splash damage also nullifies the benefits of any cover enemies are using.

On the downside, it has a low rate of fire, and its weight makes it very slow to rotate to face new targets, making it less effective for defending a wide front than its other long ranged cousin, the golf clubs. It also has a minimum range, and provides no cover, so it will quickly fall to ranged and melee units alike if not supported with other defences

The turnip turret is the pinnacle of technology in the Scottish arsenal. Its high rate of fire and ability to rotate quickly enable it to defend a large area from approaching melee enemies. It can fire further than Scotsmen, and most enemies, although its accuracy makes it less effective against more distant enemies, particular those in cover.

It is however, the most expensive tower, and with its low hit-points, it is something of a glass cannon. While it provides decent cover from the front, a lucky shot, or a hit from the side can easily take out the operator, enabling melee units to close in and destroy it very quickly. The player will need to make sure it is placed in a defensible position, and back it up with nearby Scotsmen to take over if the operator is killed. Placing it near a fondue hose or whisky bar will help protect it from melee units when it is not manned.

Julius Caesar

Julius Caesar finds himself facing off against a gladiator rebellion one day at the Roman Colosseum. By an extraordinary coincidence, at that very moment, an airship full of Scotsmen arrives with the intention of building a haggis factory in the Colosseum. Caesar agrees to aid the Scotsmen in their mission, if they help him defeat the uprising. And that is how the Scotsmen acquire their third hero character during their World Tour. True story.

Julius Caesar is an expert in ranged skirmishes with enemy ranged units, as his shield protects him from enemy projectiles, and he can throw his javelin further and more accurately than regular Scotsmen can throw their porridge bowls. In melee he is less effective than Alfredo or Joan of Arc, but can still hold his own, fighting with a short sword. The best strategy is to put him somewhere that he has protection from melee combat, while still being in the thick of the projectile combat.

When in Rome - Build a Haggis Factory

As they travel further into Italy, the Scotsmen come across one of the world's most famous ancient landmarks – the Roman Colosseum. How could they not build a haggis factory there. Here they add a new hero character to their party, Julius Caesar (who I'll cover in the next post).

The player starts in the middle of the Colosseum, where they are sitting ducks against enemies on the higher levels. Also, only two of the oat fields are on the arena floor, so the player will need to move quickly to establish a foothold on the upper levels. There are nine entrances from which enemies spawn, so the Scotsmen will find themselves under assault from all sides. Fortunately, the uppermost levels on either side of the Colosseum have an oat field each, and no entrances, so the player can easily barricade some Scotsmen up there to hold them. The two oat fields on the second highest level will be the most difficult to hold. The newly unlocked Italian tower, the plumber pipe, will be vital in transporting Scotsmen quickly from the arena floor to the upper levels without having to go through enemy controlled areas (more on that another time).

I haven't quite finished with this level yet. I think it could do with some extra colour variation, which I'll add once I've done the light-mapping by manually painting some extra color onto the lightmap, and perhaps adding some more decals. Any suggestions are welcome as well.

Its a Spicy Meat-A-Ball

It wouldn't be Italy without someone to cook the pasta or pizza or ravioli or lasagne etc. That's why the first enemy the Scotsmen encounter when they enter Italy is the chef.

The chef carries a pot full of spicy meat-a-balls to throw at the Scotsmen. They fire five meatballs in one shot, allowing them to damage several Scotsmen if they are too closely grouped. However, they can't throw as far as a Scotsman, and are slow to average in speed. They have high health for a ranged unit.

The Scotsmen also encounter gladiators throughout Italy. (Because the game takes place in all time periods at once for some reason). They are especially common in level 6 – Colosseum.

Gladiators are uniquely resistant to frontal ranged attacks because of their shield. Any projectiles that hit it bounce off harmlessly. It doesn't provide protection against exploding projectiles however, and it does slow them down somewhat, making them very vulnerable to the haggis catapult. They can do considerable damage in melee, so killing them before they reach your Scotsmen should be a high priority.

Its-a Venice

The Scots arrive in the canal city of Venice for their first encounter with the Italians. Here they will face two new enemies, the spicy-meat-a-ball throwing Italian chef, and the gladiator, whose shield protects him from frontal ranged attacks (more details next time). They will also encounter the first instance in the game of enemies riding boats.

While on boats, enemies will only be able to use ranged attacks against the Scotsmen, and will have nowhere to run and hide, making it a perfect opportunity to pick them off. The boats will travel to set locations, where the enemies will disembark.

In Venice, the player starts on an island with two oat fields. Two bridges connect the island to the rest of the map, and there is one landing site where enemy boats can land on the island. The other four oat fields are scattered throughout the rest of the map, in locations of varying difficulty to access and defend. The player will have to strategically defend the five landing zones as much as possible, and use the bridges as choke points when enemies do manage to establish themselves on the land.

The map provides some cover in the form of parked cars, and crates and barrels outside shops, although these will likely be of more use to the enemy than the Scotsmen. The long, straight approach of the boats along the canals provides great opportunity to pick off enemies with golf clubs, and having multiple enemies crammed into each boat will make area effect weapons like the porridge cannon and haggis catapult highly effective.

Napoleon Bonaparte

The final level of each country the Scotsmen visit has a boss character they have to defeat, in order to progress to the next country. Boss characters enter the level at the beginning of the final assault phase (which occurs shortly after the player finishes constructing the haggis factory). Bosses have much higher stats than regular enemies, so eliminating them should be the player's main priority.

For France, the boss is Napoleon Bonaparte. His revolver is virtually one-shot-kill, making him deadly against Scotsmen who aren't in cover. He can fire a lot further than a Scotsman can throw, so the player will have to either use long ranged towers such as the golf clubs or haggis catapult, or move their Scotsmen forward to attack him. He is less effective in melee, fighting with a sword, but because of his deadly ranged attack, it would be ill-advised to charge out into the open to engage him in melee.

Le Chateau De Ponce

The Chateau De Ponce is an old, historic castle in the middle of the French countryside, and more importantly, the planned location of the third Haggis Factory.

It features two layers of walls on all sides but the North. All of the walls are accessible, for Scotsmen to rain porridge down from the battlements. Two oat fields are contained within the inner wall, two are within the outer wall, and another two are outside, making for a three tiered defence. If the player gets into trouble, they can withdraw into a safer tier, provided that they can afford to sacrifice the oat fields in the current tier.

Enemies spawn from all sides of the map, while the player starts in the centre. The cliffs surrounding the castle help the player by keeping the enemy's approach confined somewhat, and the walls help this further.

There are five ways into the outer wall of the castle; three gates, and two siege towers which enemies can climb. There are only two ways into the inner walls; the front gate, and a narrow plank of wood that the Scotsmen have set up as a makeshift bridge to give them access from the roof of the Haggis Factory onto the walls. These narrow entrance ways make perfect spots for the player to place the recently unlocked Fondue Hoses. However, they will have to be careful of Monks, who make their debut in this level, as their devastating holy-cross-toss is just able to out-range the Fondue Hose.

The Eiffel Tower

After their victory atAgincourt, the Scotsmen head for the French capital to establish their next haggis factory. And where better than right in front of the Eiffel tower. What possible objection could the French have to that?

They do object however, and the surrounding parklands soon become a site of oat fuelled carnage, as porridge bowls and breadsticks replace words.

Unlike in the first level, the Scotsmen will face attacks from two sides. Enemies will spawn in the bushes along the South end of the map, and on the bridge and the two road exits on the north of the map. To the North are two oat fields, on either side of the Eiffel tower. They will be the hardest to hold because of their openness, so the player will need to choose when its worth trying to hold a wider front, and when its better to sacrifice these two fields in order to funnel all the enemies coming from the north into a narrow killing zone between the tower and factory.

There are four fields to the south of the factory. The inner two will be the easiest to hold, being in the easily defended area between the factory and the pool. The outer two will require a bit more work to defend, being closer to the enemy spawn zones and more open.

There are some cars on the road which provide good cover for the Scotsmen, which are well placed to Defend from enemies coming from the North, until the player has enough men to push forward to capture the Northern oat fields. There are also some park benches which provide cover for Scotsmen defending the four closer oat fields, although the cover they provide is somewhat mediocre, so the player will want to build some better defences there once they have the money.